Add Wavy Marquee to any Shopify Theme
In this video, I'll walk you through how to easily add the Wavy Marquee feature to any Shopify site.
How to Add a Wavy Marquee Feature to Any Shopify Site
a.
Squarespace
b.
Video Walkthrough
Introduction
Wanting to add those catchy scrolling wavy text statements to your Shopify site? Learn how to add a stylish wavy marquee for free in this video. And don't worry if you're new to coding in Shopify, because I'll guide you through the process step by step.
Hi there! I'm Rache, the founder of Square Stylist and the creator behind programs for web designers, namely Standout Shopify and Standout Squarespace.
Timestamped Overview
0:01 Overview of adding the Wavy Marquee feature to Shopify
0:08 Feature Applicability: Can be added to any Shopify theme; step-by-step guide.
0:29 Instructions for accessing tutorial codes via the Resource Vault.
00:51 Steps to duplicate the Shopify site and create a staging theme.
01:26 Detailed guide on adding and editing the new section in the code.
02:12 Process of adding the Wavy Marquee section in the Shopify theme.
02:59 Customization options for text, background, and positioning.
04:58 Instructions for adding the Wavy Marquee to various pages and adjusting padding.
05:30 Encouragement to share creations and info on personalized support and programs.
Resources
To access the codes, please subscribe to our Shopify Resource vault for free
Access more workshops and personalized support through our Standout Shopify Program.
Preparing Your Shopify Site
Duplicating Your Theme
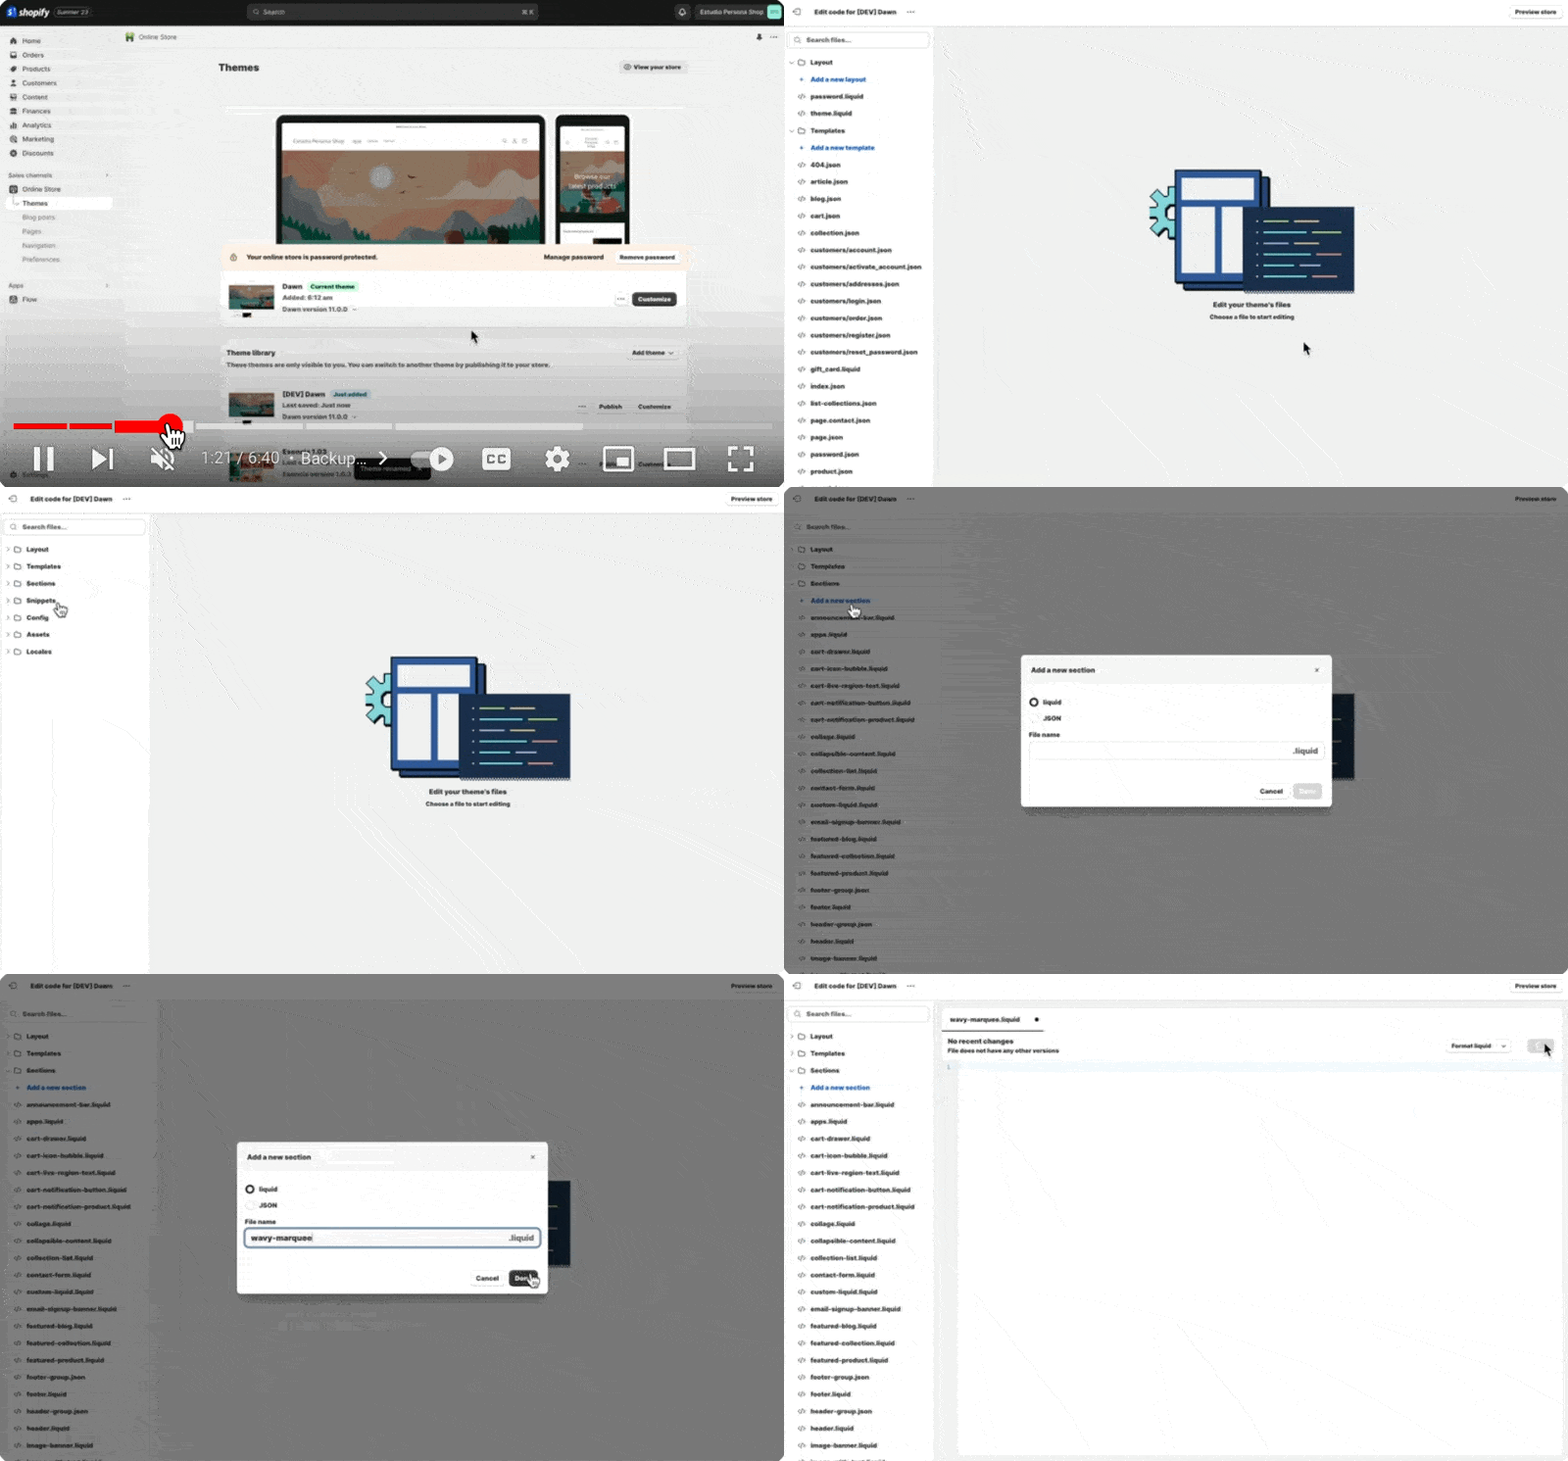
If your current Shopify site is live, I recommend duplicating it first, so we can work on a staging theme before publishing it live. To do that, click the three dotted icon under themes, and duplicate the current theme you have.
You may rename this staging theme—I typically add "dev" initials, so I would be able to differentiate it from all the other staging themes. Then, we'll click the three-dot icon again and hit edit code.
Navigating the Code
And I know some of you might be intimidated by the code, but don't worry, I'll walk you through the process. Our next step is to add a new section. In our code, we'll find folders here called layout, template, section, snippets, and so on.
What we'd like is to add a section, so we'll open this section by clicking this toggle, and then I'll create a new section by clicking the "add a new section" option, and then I'll start typing the file name, and I'll call it wavy-marquee, and hit done.
Setting Up the Wavy-Marquee
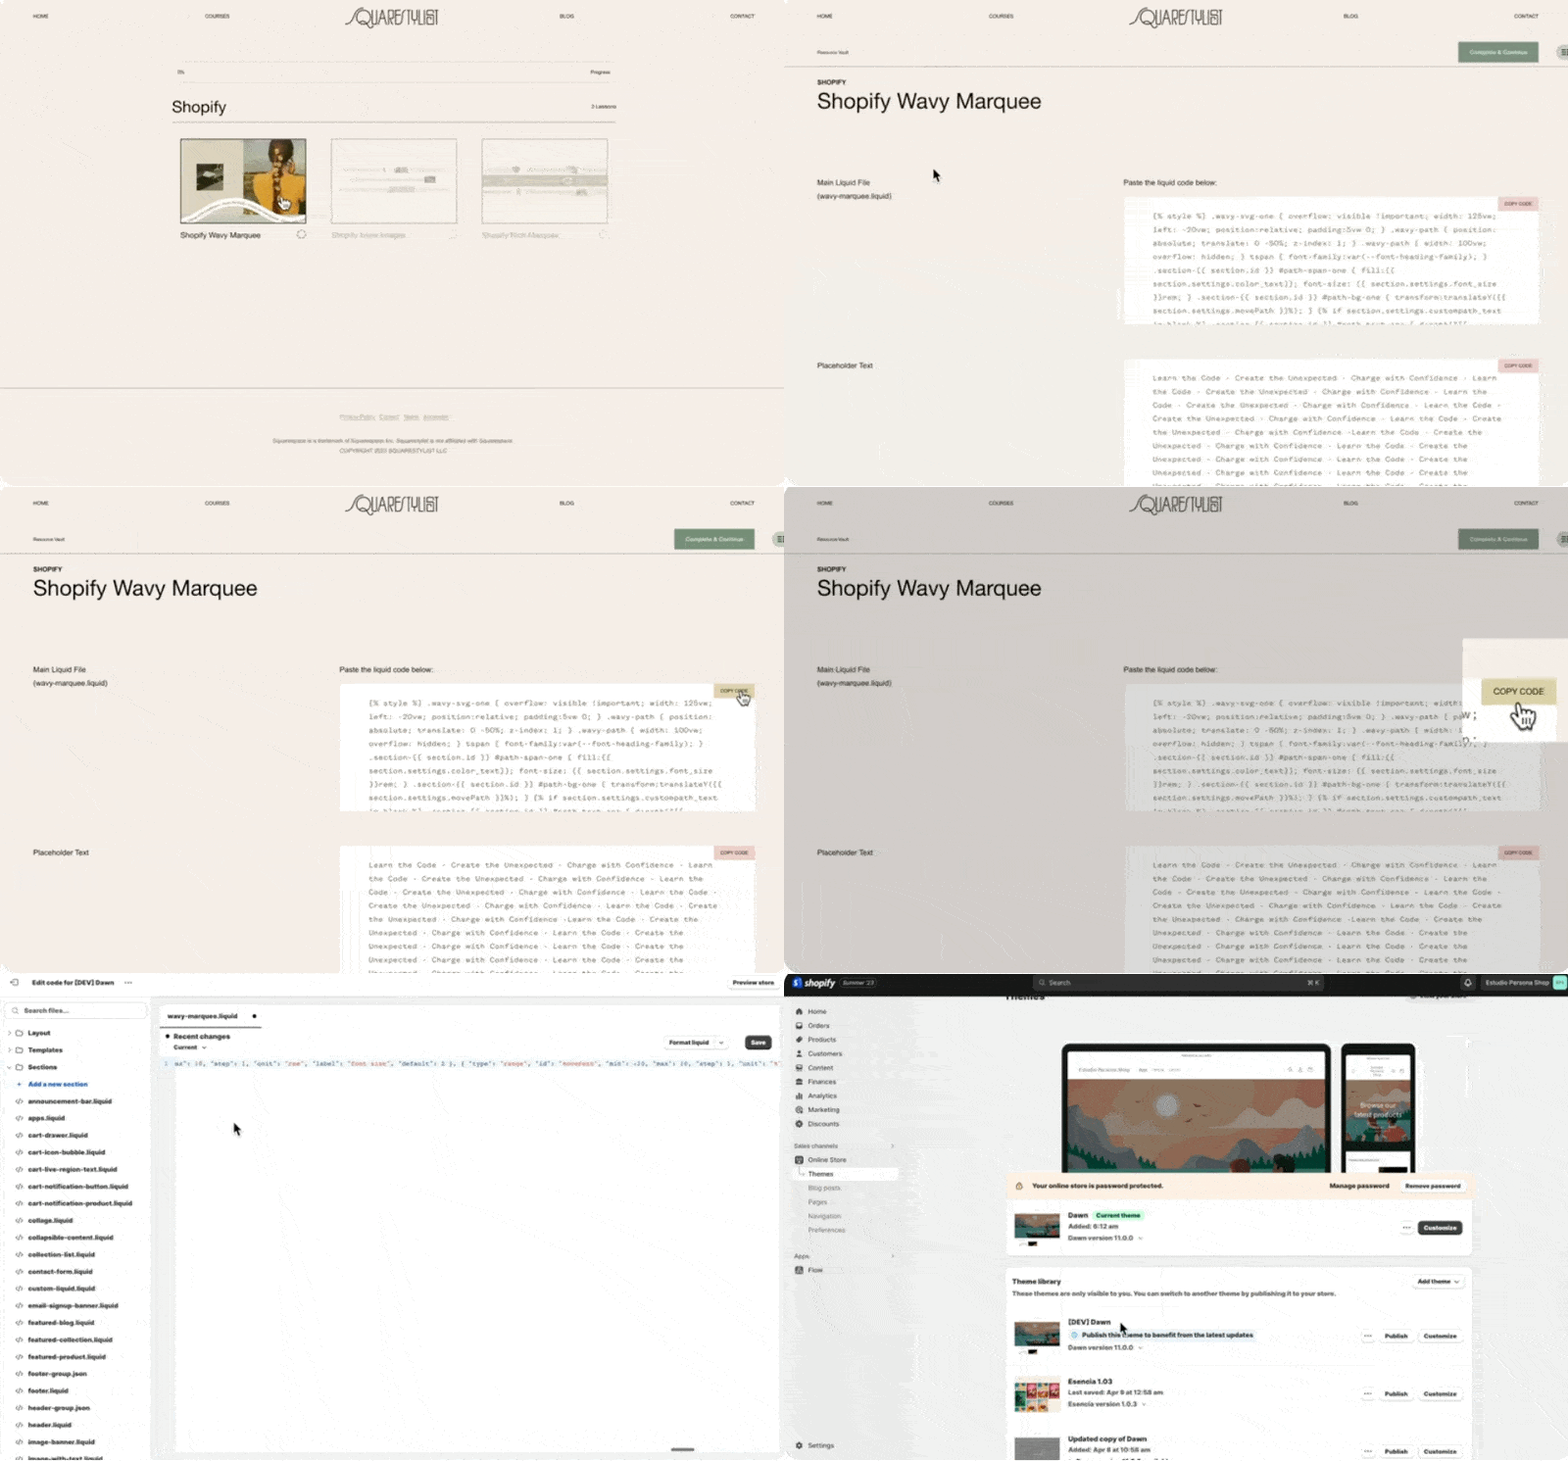
Some default content will be automatically loaded. We have to delete this by hitting command A or control A on your keyboard, and then deleting everything. Hit save, you may then click the Shopify wavy-marquee entry in our resource vault, and then opposite this main liquid file title, please copy this code by clicking the "copy code" button.
Then we paste all the codes in our liquid file. After that, we hit save, then we go back to our staging theme.
Customizing Your Shopify Scrolling Text
Adding the Wavy-Marquee Section
Again, this is the one with the initial dev, and I'll hit customize right here so that we can build the page. When we click "add a section," there will now be an option for us to add the wavy-marquee, so we can start typing wavy, and then this section will show up. Now once the wavy-marquee section is loaded, we can click here.
Configuring the Marquee Text
Under the settings of the wavy-marquee section, we'll find that we're prompted to add the marquee text. We may refer back to our resource vault entry, and opposite placeholder text, we'll find this placeholder text that you can copy, and then paste it right here. Now you'll find that we now have this wavy-marquee installed, and we can add some customizations.
Personalizing Appearance
For example, at the moment it has a transparent background, so if we'd like to add a background color to it, let's toggle off this transparent background and assign a background color of our choice. So for example, I can use any of these colors, and the text color can be adjusted as well, and the font size can be adjusted too, for example, if I'd like this to be bigger, and if you'd like to adjust the position of the background, we can use this background movement option.
So because I'd like this to move up the background color of green, I'll use a negative percentage value. So for example, negative 3%, so notice how this is a way for us to center the background relative to the text.
Extending the Marquee to Other Pages
And then once we have this installed, we can now place it anywhere within the page. So each page can have a wavy-marquee, so if you'd like this to show up on other pages as well, like a contact page or about page, it's totally possible to add this as well. So I recommend that on the section that is below this wavy-marquee, we can add some padding. Most of the themes will have this top and bottom padding option.
So for the second section, I'll just add some more padding. Of course, you'd want to replace this with your own statement. So all you need to do is add the statement right here and copy and paste it multiple times, similar to the length that you're not seeing in our more key text field.
Finalizing Your Design
Also, you'll find that there are some more options available for us, like custom path for text and custom path for the background. I'm not able to discuss these advanced options in this video, but I discussed this in more detail in my standout Shopify program. And as soon as you're happy with the changes that you've made, you may go ahead and publish this version of the theme.
We'd love to see what you create using our resources. Please tag us on Instagram via @squarestylist with your creations. And I'd like to note that while I would love to support you in implementing these section templates in your Shopify sites, each Shopify theme would have different existing codes. So I'm not able to provide personalized support via the comments below. But if you are looking for more high-touch support, I provide that inside my program, Standout Shopify.
Inside the program, I regularly share more creative layouts that you can easily add to your Shopify sites. And I personally attend to questions such that you can customize these sections to your branding or to the needs of your projects along with the fundamental lessons such that you'll learn more about how to maximize built-in features in Shopify such as metafields and meta objects.
And if aside from Shopify you're also creating Squarespace websites, please check out our video about adding a wavy marquee to Squarespace via the description box below or anywhere on this video.


